Chat Interface Overview
The chat interface provides multiple ways to interact with your AI bot. Let's explore each function:
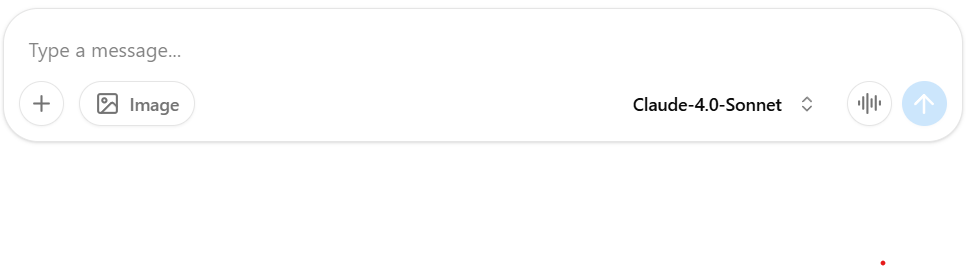
1. Text Input and Send Button
- Type your message in the input box
- use Shift + Enter to send a new line
- Left sections: file upload, shortcut prompts
- Right sections: voice recognition, send button
- Click the send button or press Enter to send
2. File Upload
- Click the file upload icon
- File upload limits:
- Documents (max 20MB): PDF, TXT, DOC(X), CSV, XLS(X), HTML, JSON, MD, etc.
- Images (max 10MB): JPEG, JPG, PNG, GIF, WEBP, SVG
- Audio (max 5MB): MP3, MP4, MPEG, MP4A, WAV, WEBM, ACC
- Maximum 9 files total per upload
- Tips: Compress large files before uploading

3. Generate Image
- You can ask the AI to create images for you right in the chat!
- Type your request in the input box, such as "Draw a cat reading a book" or "Create a picture of a sunny classroom."
- Look for the image or magic wand icon near the input box—click it to switch to image generation mode if needed.
- After you send your request, the AI will generate an image and show it in the chat.

Tips:
- Be clear and specific about what you want in the image for best results.
- Image generation may take a few seconds longer than text replies.
- There may be limits on how many images you can generate per day.
Note: The bot's response time may vary depending on the input type and current server load.
Troubleshooting
If you encounter issues:
- Check your internet connection
- Verify file sizes and formats
- Clear browser cache if needed
- re-login and Refresh the page if the issue persists
Need more help? Contact our support team at enquiry@zenseai.io
Last updated: October 22, 2025